👩🔧Embracing DevSecOps: Automating Security in Continuous Integration and Deployment


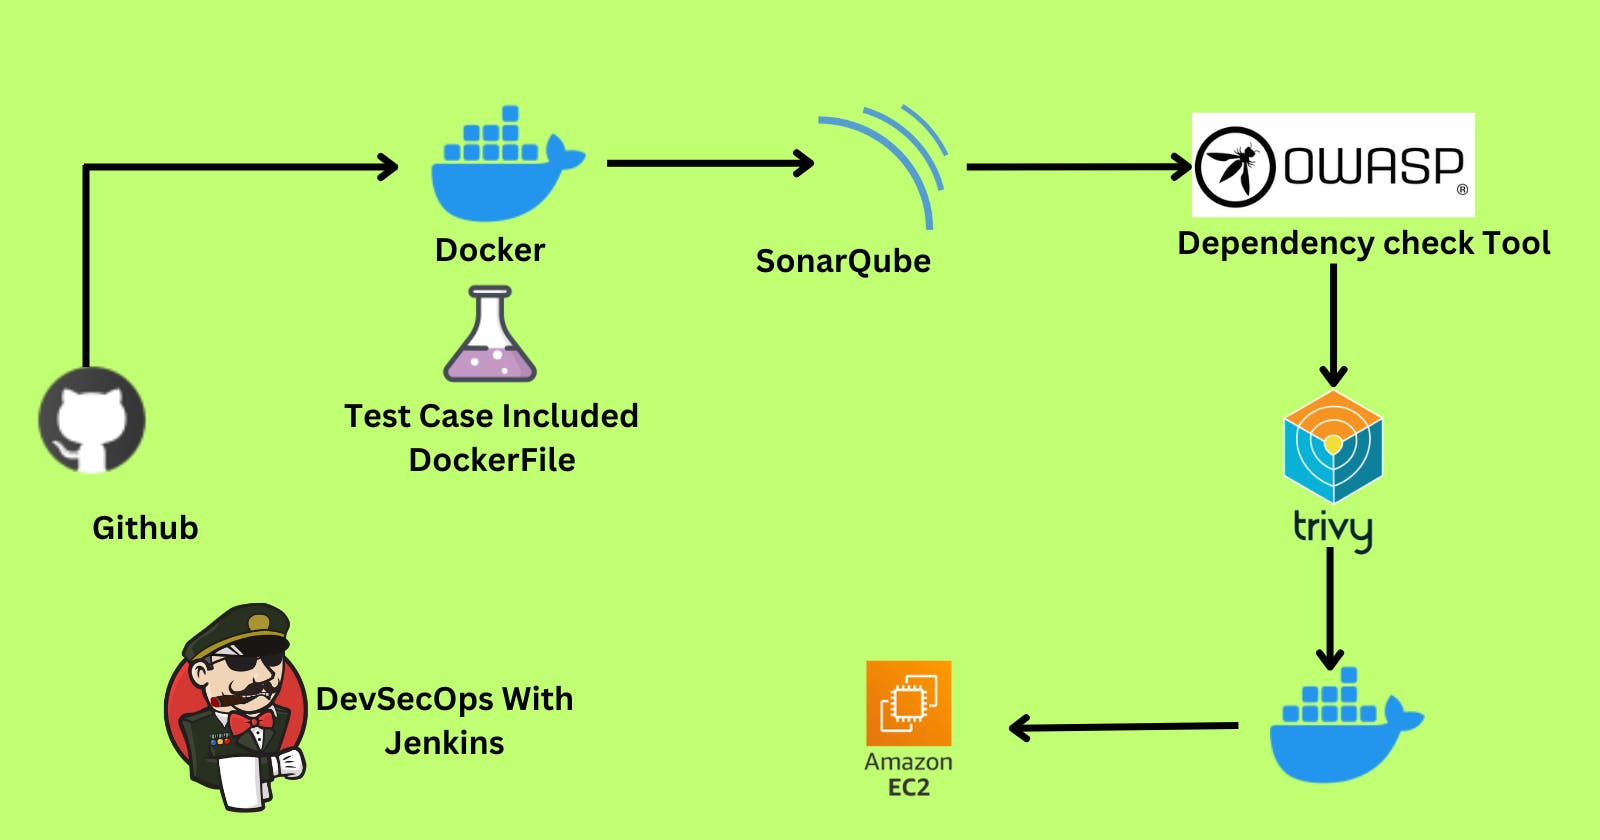
Table of contents
📍Prerequisite
AWS EC2 VM : We will be Using Amazon Machine Image As Ubuntu.
GitHub : we will Bring our code from a github repo where we have pushed the code.
Jenkins : Jenkins CI/CD is an automation server used for continuous integration and continuous deployment pipelines.
Docker and Docker-Compose : Docker container platform that allows you to build,test,deploy application quickly and Docker Compose is a tool for defining and running multi-container Docker applications in a single docker file.
SonarQube : for continuous inspection of code quality to perform automatic reviews with static analysis of code to detect bugs, code smells, and security vulnerabilities.
OWASP : It Stands for Open Web Application Security Project dedicated to improving software security by providing resources, tools, and guidelines for securing web applications and APIs.
Trivy : Is an open-source vulnerability scanner for containers and other artifacts such as Kubernetes configurations, Terraform configurations, and AWS CloudFormation templates. It is designed to detect vulnerabilities in the dependencies of container images and other deployment artifacts.
Above All are our prerequisite make sure to have this which ensure Security throughly.
⚙Project
Launch EC2 Instance: Opt for minimum t2.large Machine with Ubuntu AMI.
Install Openjdk 17-jre: As per the Jenkins Docs we will need Java to run Jenkins on your machine.
 sudo apt update
 sudo apt install fontconfig openjdk-17-jre
 java -version
Install Jenkins: Make sure to download Long Term Support Version of Jenkins.
 sudo wget -O /usr/share/keyrings/jenkins-keyring.asc \
   https://pkg.jenkins.io/debian-stable/jenkins.io-2023.key
 echo "deb [signed-by=/usr/share/keyrings/jenkins-keyring.asc]" \
   https://pkg.jenkins.io/debian-stable binary/ | sudo tee \
   /etc/apt/sources.list.d/jenkins.list > /dev/null
 sudo apt-get update
 sudo apt-get install jenkins
Now enable Jenkins to run that even after reboot and verify the Jenkins service with below command:
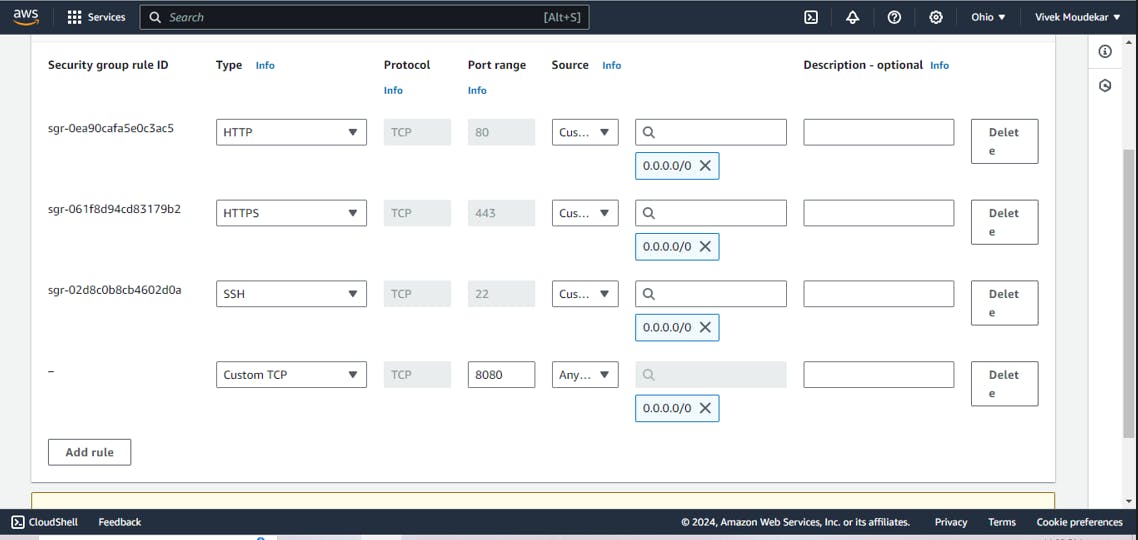
 sudo systemctl enable jenkins
 sudo systemctl status jenkins
Allow Default Port 8080 of Jenkins in security group to access jenkins.
Install Runtime Build Tool Docker and Docker-Compose:
sudo apt-get install docker.io docker-compose -yAdd Current User & jenkins into docker group and enable docker:
 sudo usermod -aG docker $USER
 sudo usermod -aG docker jenkins
 sudo systemctl enable docker
Reboot your system to make changes apply and Check current user & jenkins added in docker group:
 sudo reboot
 sudo cat /etc/group
Install SonarQube:
We will create a Docker container running SonarQube Community Edition LTS (Long Term Support) version.
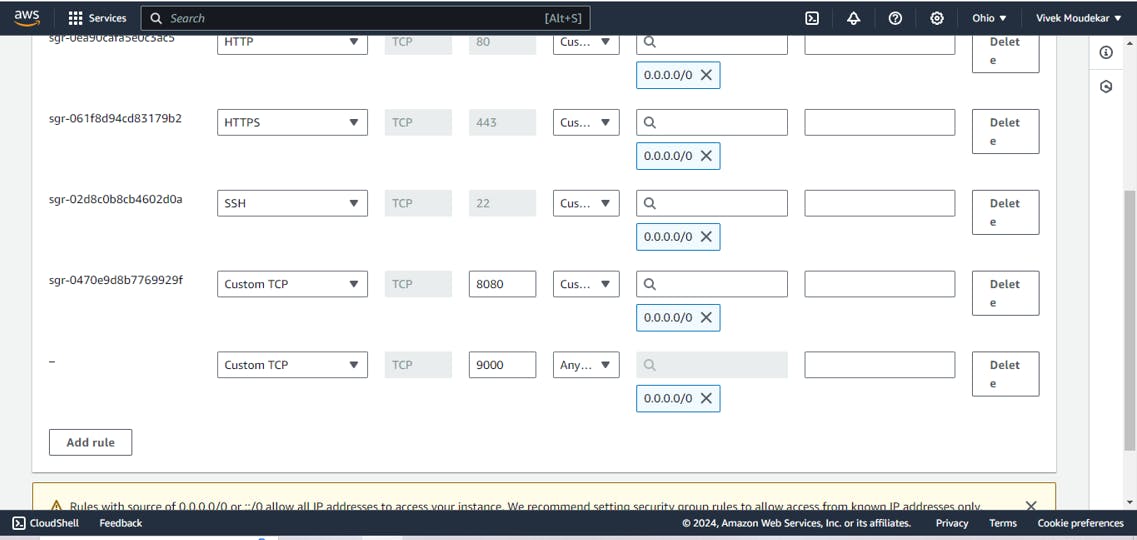
docker run -itd --name sonarqube-server -p 9000:9000 sonarqube:lts-communityAdd default Port of SonarQube 9000 and docker port 8000 to Security group.
Access Jenkins Server : With url as
http://<publicIP>:8080Go for Select suggested plugins.
After Accessing you'll get path:
/var/lib/jenkins/secrets/initialAdminPasswordcopy the directory path and paste it in terminal to get password and create Jenkins acount with the help of that :
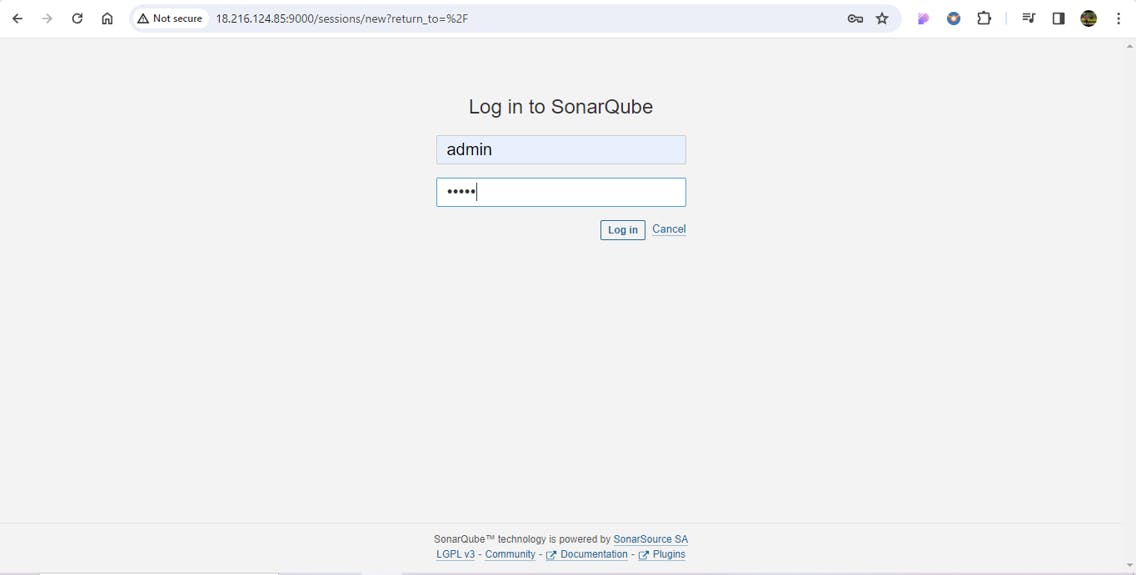
sudo cat /var/lib/jenkins/secrets/initialAdminPassword
# This will show you password to access jenkins copy and paste in UI
Access SonarQube Server: To access server just use
http://<publicIP>:9000Initially username and password will be ‘ admin’ , ’ admin’. Just change with a new password.
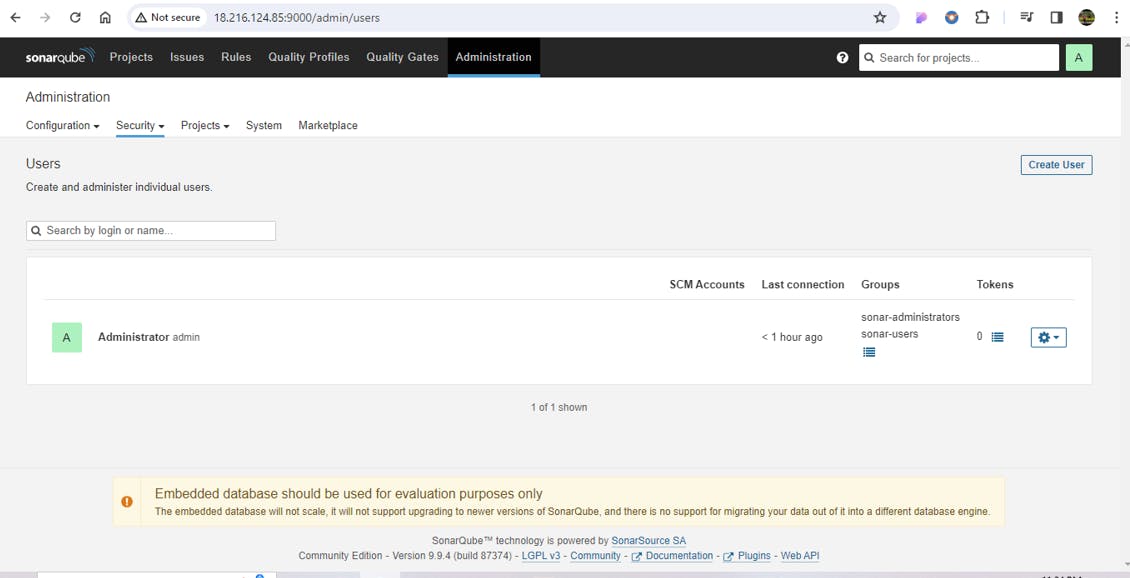
Create users token in SonarQube: To Access the SonarQube server by jenkins Through Sonar Scanner tool Generate Token here.
Click on Administration tab-> Security-> Users-> create Token name as Jenkins.
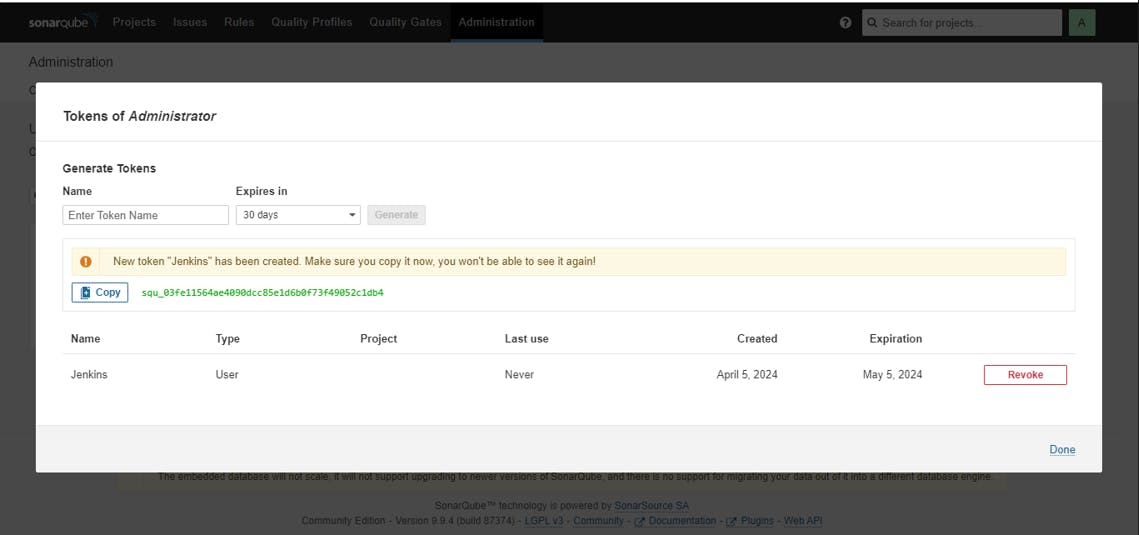
token generated, just copy and paste to somewhere else. because Once window is closed, you wont be able to see that again.
Now to Integrate SonarQube with Jenkins.
Manage Jenkins-> Plugins-> Avail plugins-> SonarQube Scanner
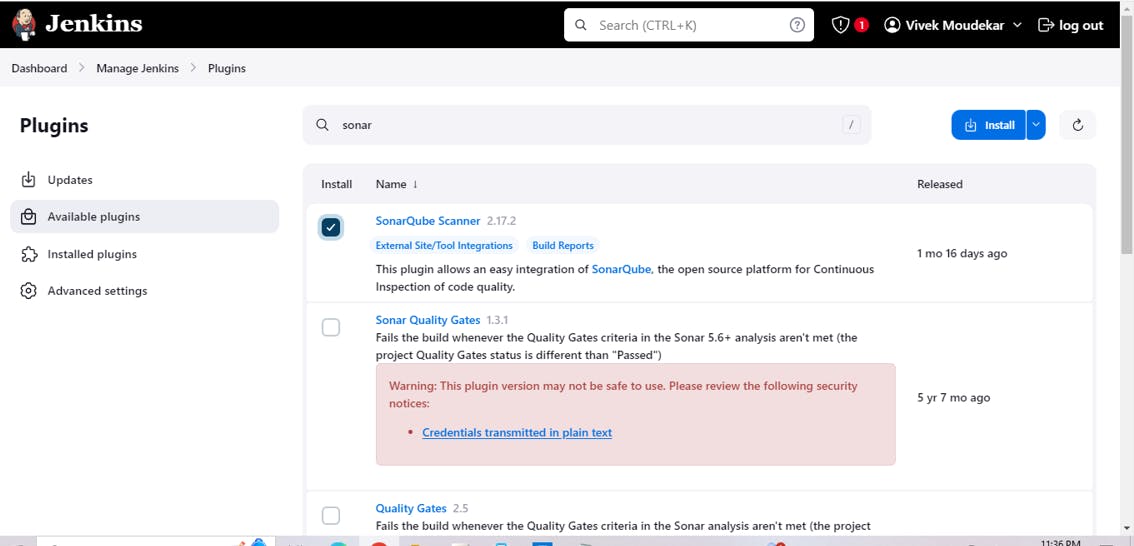
Sonar Scanner is tool of sonarqube which will bring code from GitHub and Compress that code and will send to Sonar Server.
Sonar Server Features:
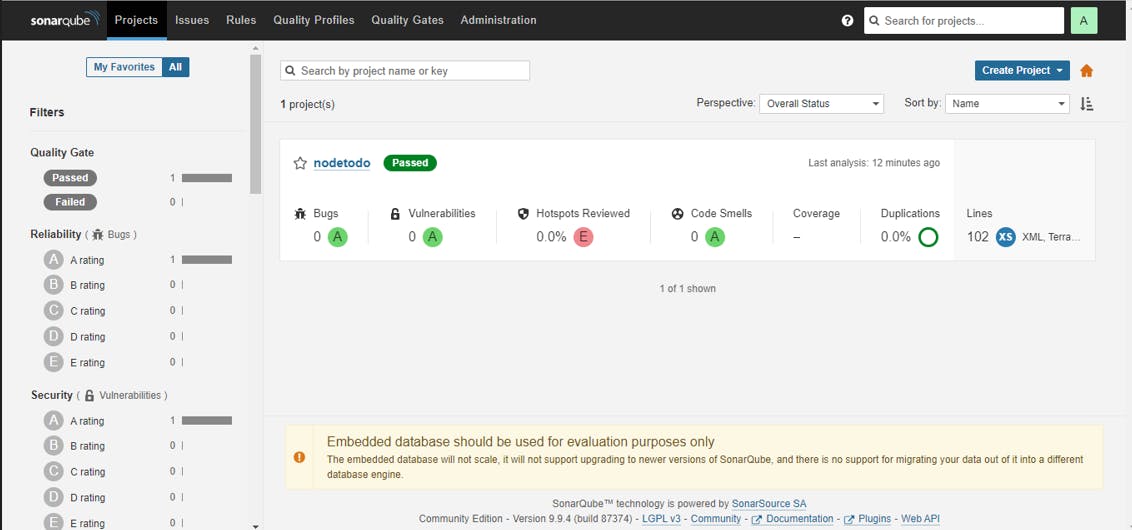
1) Scans for Vulnerabilities
2)Code Coverage(How much Code is Testaable)
3)Check for Code smell
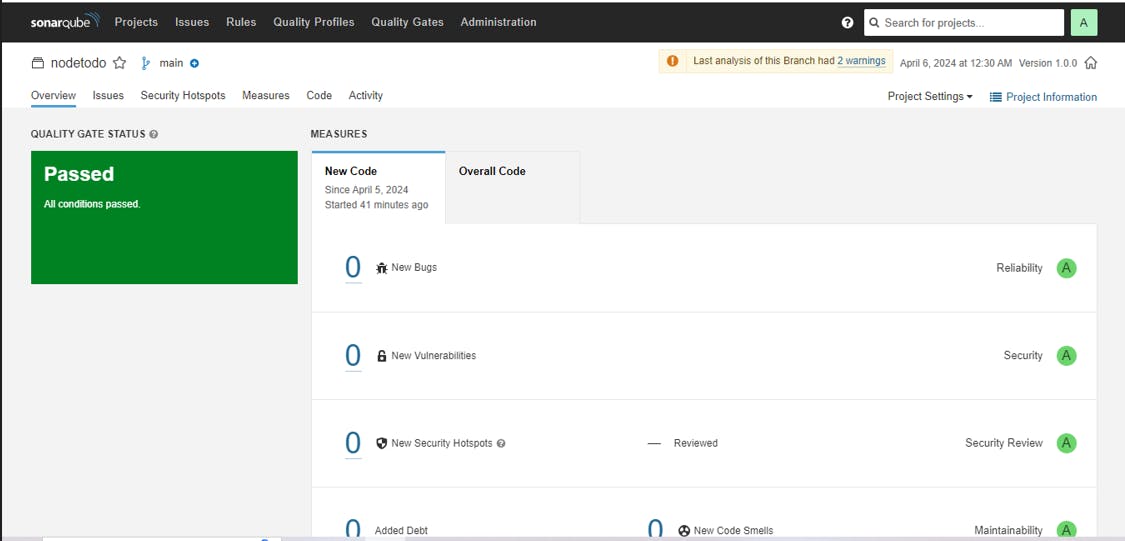
3) Quality Gate(Code Quality which is rated by Percent)
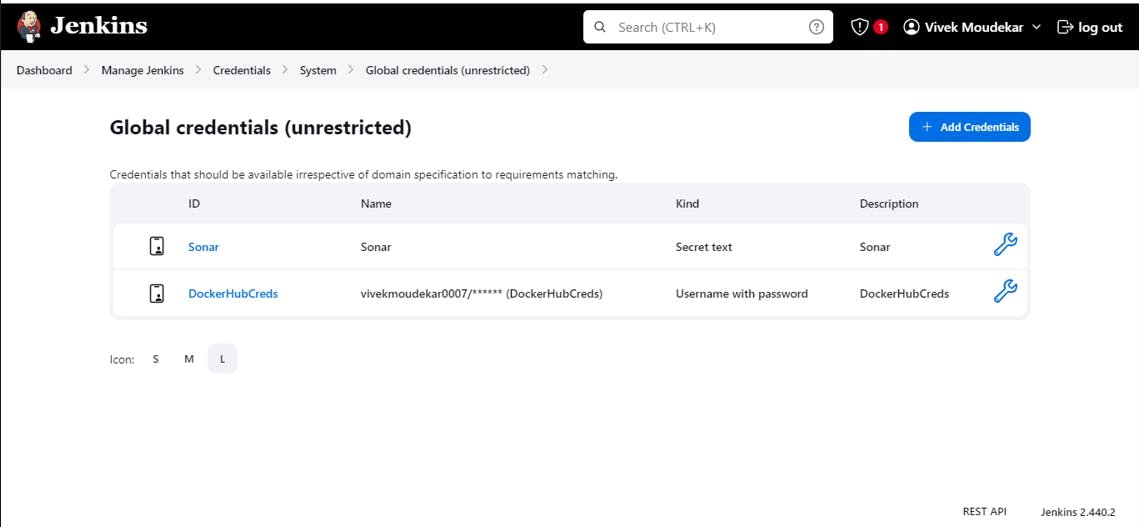
Now Configure SonarQube Credentials to Jenkins
Manage Jenkins-> Credentials-> Global-> Add Credential.
Kind-> Secret Text -> Secret -> ID
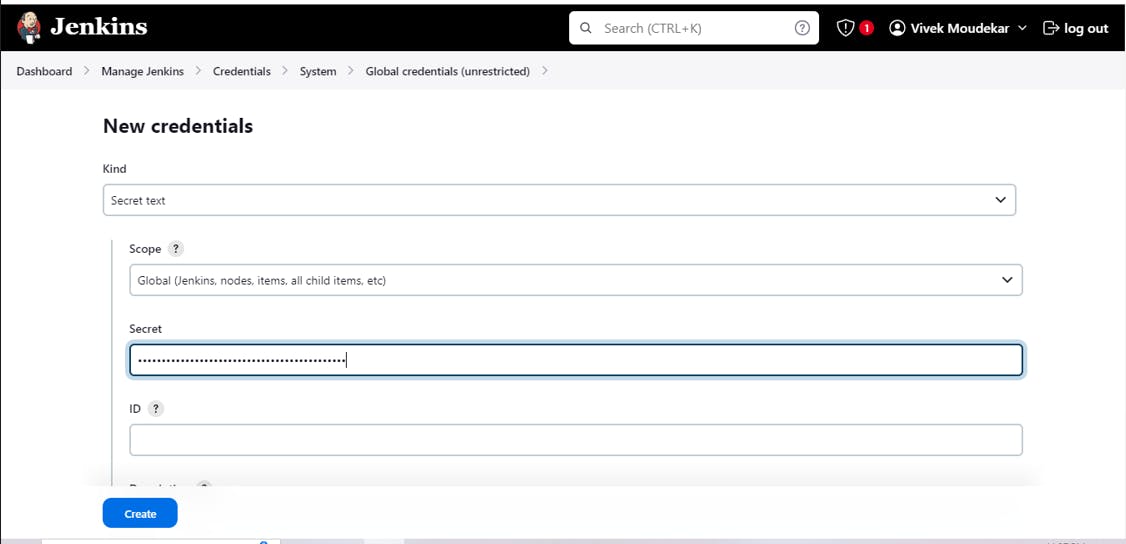
Add the Secret Text the "Token" which we have Generated in Step13 and ID as Sonar and Create.
Same for Docker Add Docker Credential because after creating Image It will push that Project Image to DockerHub.
Add Credentials -> Kind ->Username ->Password
Select Username and password in Kind Section, Add Username and Password Of your DockerHub account.
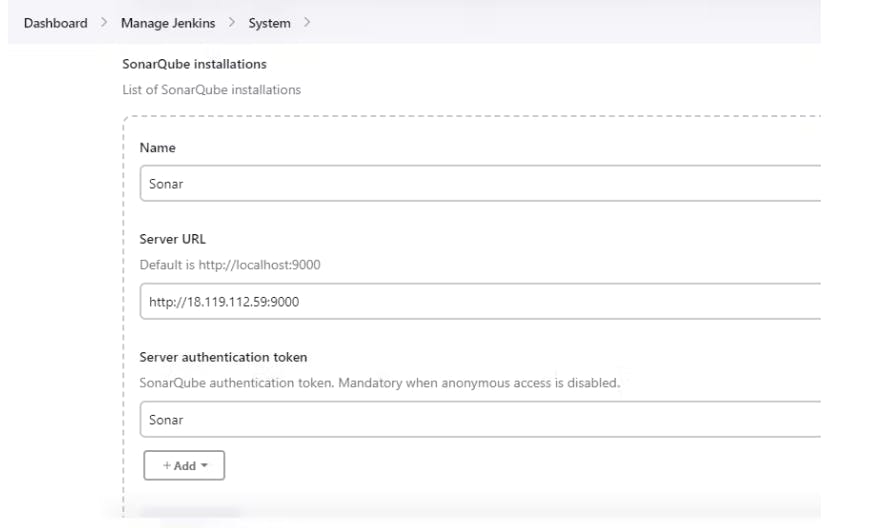
Add SonarQube in Jenkins:
To link anything in Jenkins you have to change system
Manage Jenkins-> System-> SonarQube Servers-> SonarQube Installations
Server authentication token: Sonar
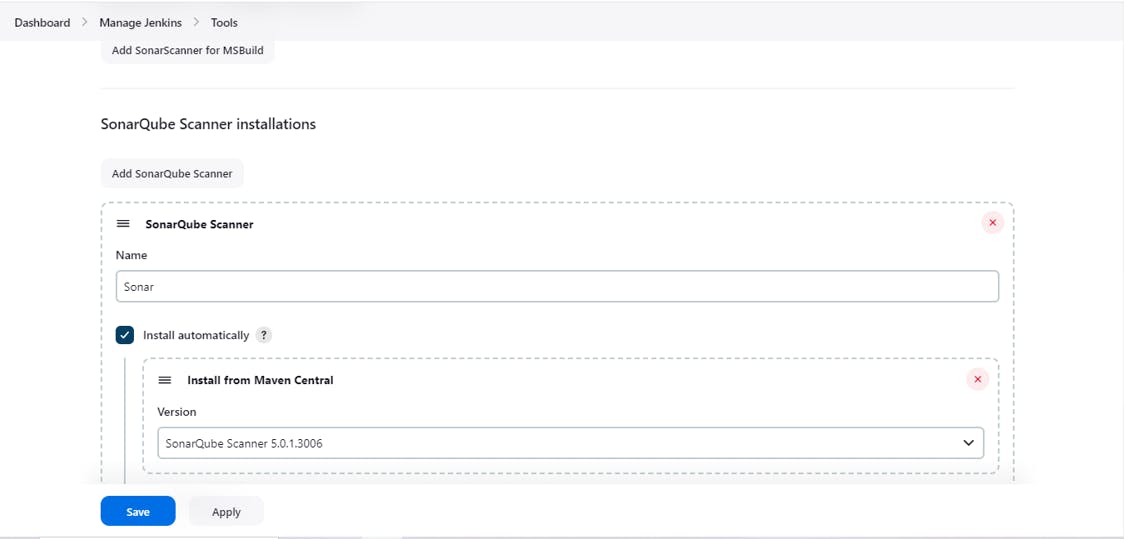
Add SonarQube Scanner from tools:
to enable Sonarscanner
Manage Jenkins-> Tools-> SonarQube Scanner
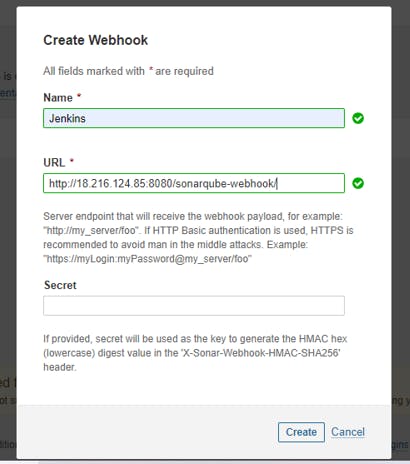
Create a webhook in SonarQube:
Used to notify External services "Jenkins" When Project Analysis Done.
Administration-> Configuration-> Webhook-> Create
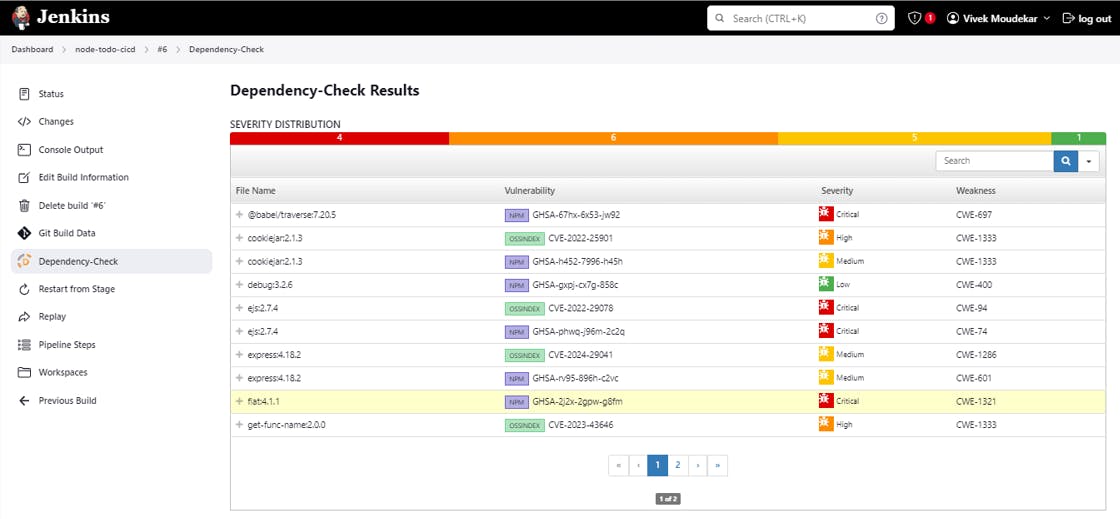
Add OWASP from tools:
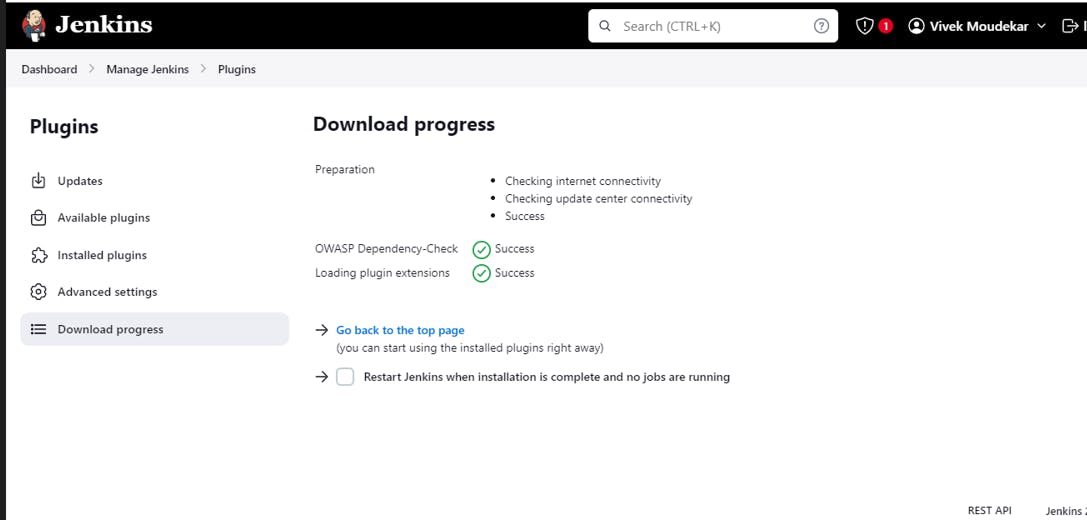
Manage Jenkins-> Plugins-> OWASP DependencyCheck install
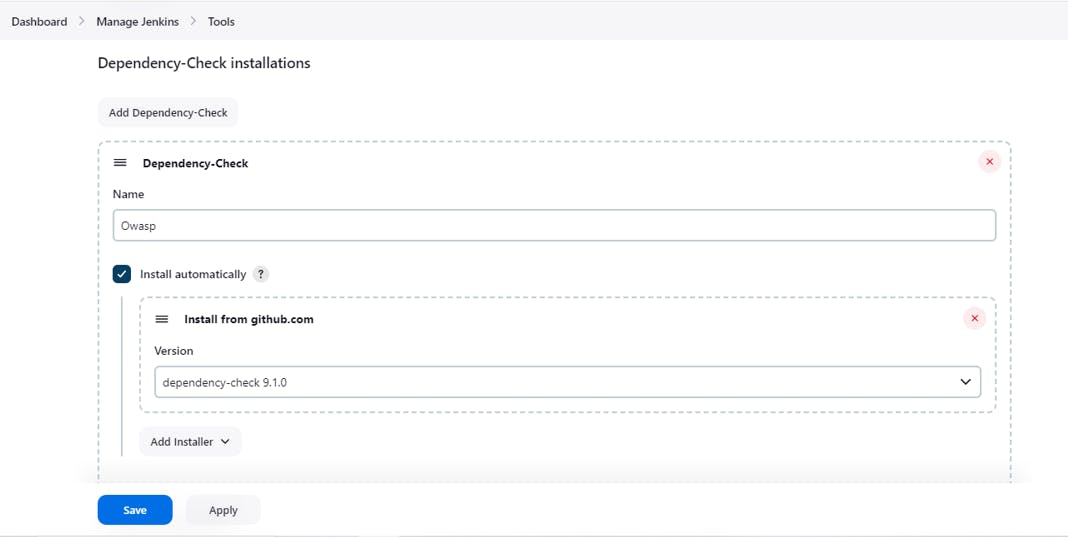
Manage Jenkins-> Tools-> Dependency-Check installations
Select Install from Github.com and it will take version.
Install Trivy:
sudo apt-get install wget apt-transport-https gnupg lsb-release
wget -qO - https://aquasecurity.github.io/trivy-repo/deb/public.key | sudo apt-key add -
echo deb https://aquasecurity.github.io/trivy-repo/deb $(lsb_release -sc) main | sudo tee -a /etc/apt/sources.list.d/trivy.list
sudo apt-get update
sudo apt-get install trivy
Build Pipeline:
New Item-> (Enter Project Name)-> Pipeline-> OK
Configuration-> GitHub Project(Github url)-> Build Trigger(Github hook trigger)
Select Pipeline script-> Paste Pipeline Syntax. This code written at the time of making declarative pipeline which we have modified according to project requirement.
pipeline {

    agent any
     environment{
        SONAR_HOME = tool "Sonar"
    }
    stages {

        stage("Code"){
            steps{
                git url: "https://github.com/moudekarvivek/node-todo-cicd.git" , branch: "master"
                echo "Code Cloned Successfully"
            }
        }
        stage("SonarQube Analysis"){
            steps{
               withSonarQubeEnv("Sonar"){
                   sh "$SONAR_HOME/bin/sonar-scanner -Dsonar.projectName=nodetodo -Dsonar.projectKey=nodetodo -X"
               }
            }
        }
        stage("SonarQube Quality Gates"){
            steps{
               timeout(time: 1, unit: "MINUTES"){
                   waitForQualityGate abortPipeline: false
               }
            }
        }
        stage("Build & Test"){
            steps{
                sh 'docker build -t node-app:latest .'
                echo "Code Built & Test Successfully"
            }
        }
        stage("OWASP"){
            steps{
                dependencyCheck additionalArguments: '--scan ./', odcInstallation: 'OWASP'
                dependencyCheckPublisher pattern: '**/dependency-check-report.xml'
            }
        }
        stage("Trivy"){
            steps{
                sh "trivy image node-app"
                echo "Image Scanned Successfully"
            }
        }
       stage("Push to Private Docker Hub Repo"){
            steps{
                withCredentials([usernamePassword(credentialsId:"dockerHub",passwordVariable:"dockerPass",usernameVariable:"dockerUser")]){
                sh "docker login -u ${env.dockerUser} -p ${env.dockerPass}"
                sh "docker tag node-app:latest ${env.dockerUser}/node-app:latest"
                sh "docker push ${env.dockerUser}/node-app:latest"
                }

            }
        }
        stage("Deploy"){
            steps{
                sh "docker-compose down && docker-compose up -d"
                echo "App Deployed Successfully"
            }
        }
    }
}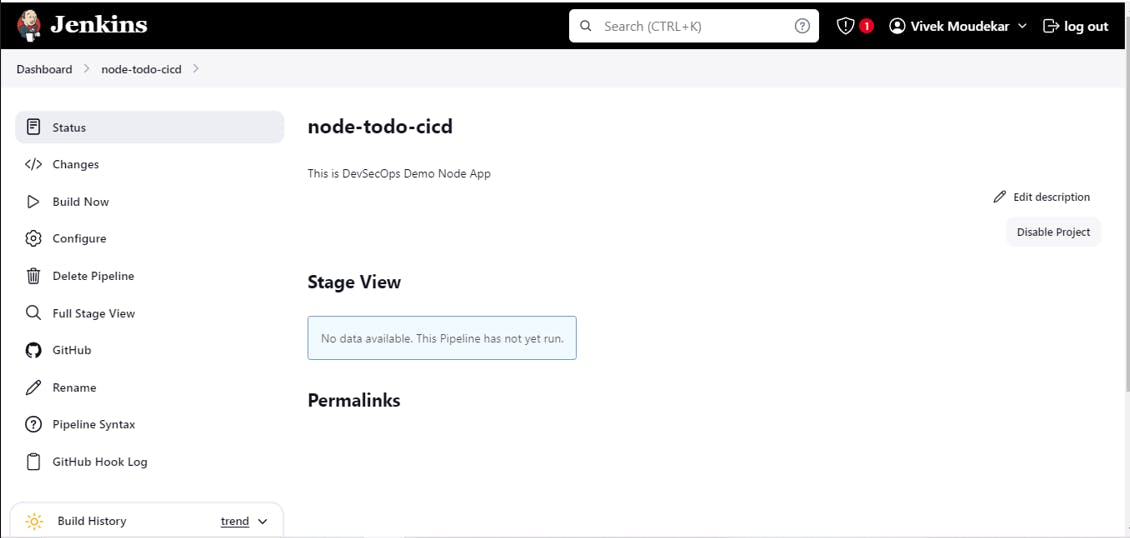
Save & Build Now
The Stages Box sequence will show as per your code.
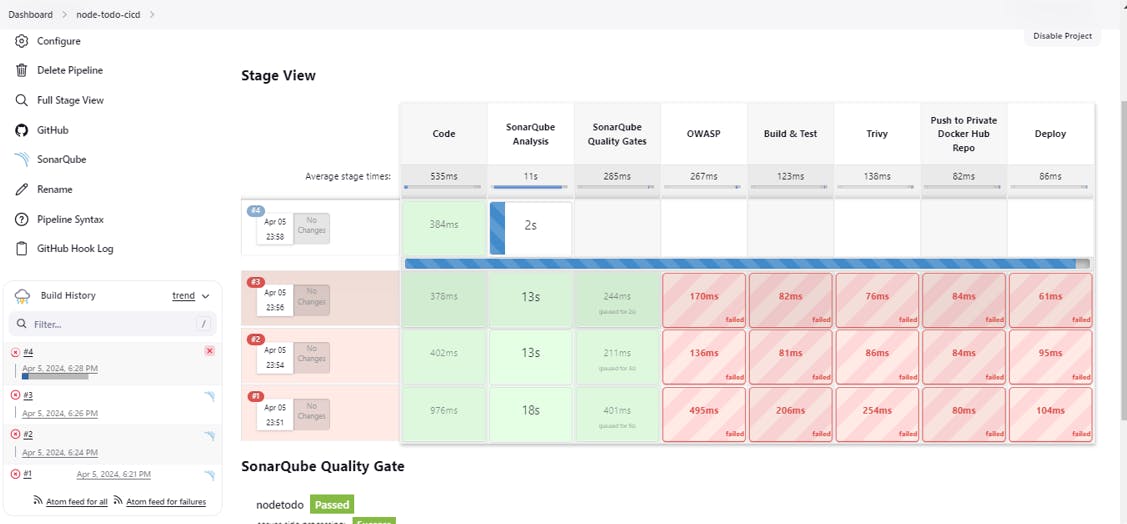
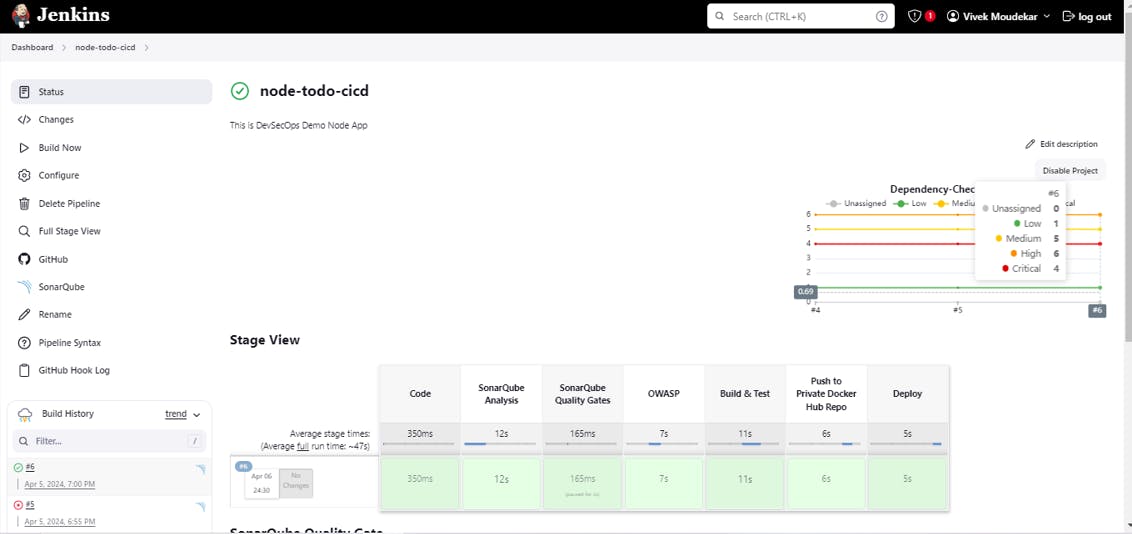
Successfully Automated the Pipeline after many fails.
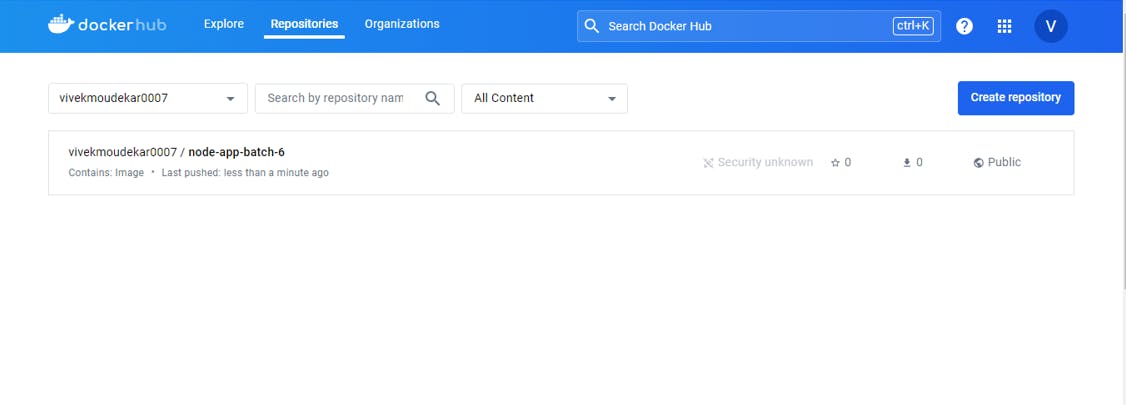
Automated the Project Image Push On DockerHub.
To access App:
PublicIP:8000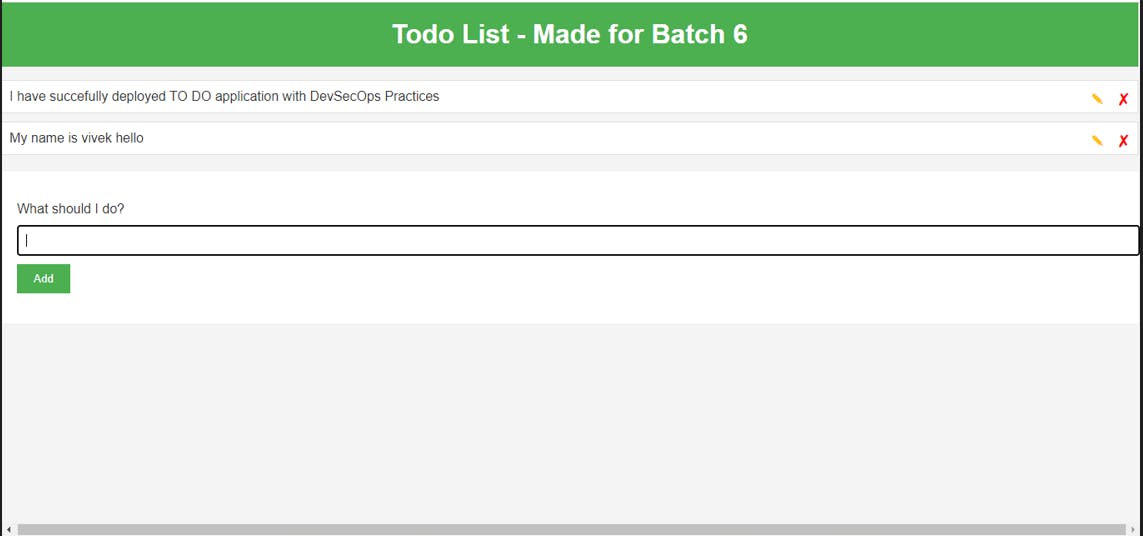
🎊Congrats we Successfully deployed App. with Security Practices.
Note : We can also automate if Code changes at Github pipeline will auto build using Github WebHooks.
Happy Learning😊