♾Day 23 - Jenkins Freestyle Project for DevOps Engineers.

👋 Hello there! I'm Vivek, a DevOps enthusiast with a keen interest in streamlining software delivery. I hold a Master's degree in Computer Applications and have a solid foundation in key technologies such as Linux, Git, Docker, Kubernetes, and AWS.
💻 My passion lies in automation, ensuring efficient and seamless processes throughout the software development lifecycle. I thrive on creating robust CI/CD pipelines that empower teams to deliver high-quality software with confidence.
🚀 Beyond the code, I enjoy the ever-evolving world of DevOps and the challenges it brings. Join me on this journey as I explore new ways to enhance software delivery and foster a culture of continuous improvement.
Let's connect, collaborate, and make the world of DevOps even more exciting together
What is CI/CD?
CI/CD stands for Continuous Integration is the practice of automating the integration of code changes from multiple developers into a single codebase.It is a software development practice where the developers commit their work frequently into the central code repository (Github or Stash).
Then there are automated tools that build the newly committed code and do a code review, etc as required upon integration. The key goals of Continuous Integration are to find and address bugs quicker, make the process of integrating code across a team of developers easier, improve software quality and reduce the time it takes to release new feature updates.
Let's see Continuous Delivery (or Continuous Deployment).
Continuous Delivery (CD) is the practice of automatically building, testing, and preparing code changes for deployment to production. With continuous delivery, every change that passes automated tests can be deployed to a production environment, where it's ready to be released to customers at any time.
Continuous Deployment (CD) is automatically deploying every change that passes through the pipeline to production,without human intervention. This is done when you want a fully automated pipeline without human intervention where rapid and frequent releases are essential.
What Is a Build Job?
A "build job" typically refers to a task or process within software development where source code is compiled, tested, and packaged into a deployable format. It's a fundamental step in the software development lifecycle, especially in continuous integration and continuous delivery (CI/CD) pipelines.
Here's what happens in a typical build job:
Compilation: The source code is translated into machine-readable instructions or bytecode. This step ensures that the code is syntactically correct and can be executed by the target platform.
Testing: Automated tests are run against the compiled code to ensure that it behaves as expected and meets the specified requirements. These tests can include unit tests, integration tests, and end-to-end tests.
Packaging: Once the code passes all tests, it is packaged into a deployable artifact, such as a binary executable, a library, or a container image. This artifact can then be deployed to production or other environments.
Deployment (optional): In some cases, the build job may also involve deploying the packaged artifact to a specific environment for further testing or production use.
What is Freestyle Projects ?
In Jenkins, a Freestyle Project is a flexible and customizable way to create build jobs without needing to write complex scripts or configure pipelines.
With Freestyle Projects, users can configure build steps, such as checking out source code from version control, compiling code, running tests, and deploying artifacts. The configuration is done through a web interface, where users can add build steps, configure triggers, set up post-build actions, and define build parameters.
Task-01:Creating Freestyle Project for Dockerized Apps
Create a AWS EC2 instance and connect that instance with you local terminal using SSH Client Method and then for installing Jenkins we want our system to have Java so will do using below commands.
sudo apt update
sudo apt install fontconfig openjdk-17-jre
java -version
openjdk version "17.0.8" 2023-07-18
OpenJDK Runtime Environment (build 17.0.8+7-Debian-1deb12u1)
OpenJDK 64-Bit Server VM (build 17.0.8+7-Debian-1deb12u1, mixed mode, sharing)
After this will Install jenkins Long term Support version for Ubuntu/debian using the following commands.
sudo wget -O /usr/share/keyrings/jenkins-keyring.asc \
  https://pkg.jenkins.io/debian-stable/jenkins.io-2023.key
echo deb [signed-by=/usr/share/keyrings/jenkins-keyring.asc] \
  https://pkg.jenkins.io/debian-stable binary/ | sudo tee \
  /etc/apt/sources.list.d/jenkins.list > /dev/null
sudo apt-get update
sudo apt-get install jenkins
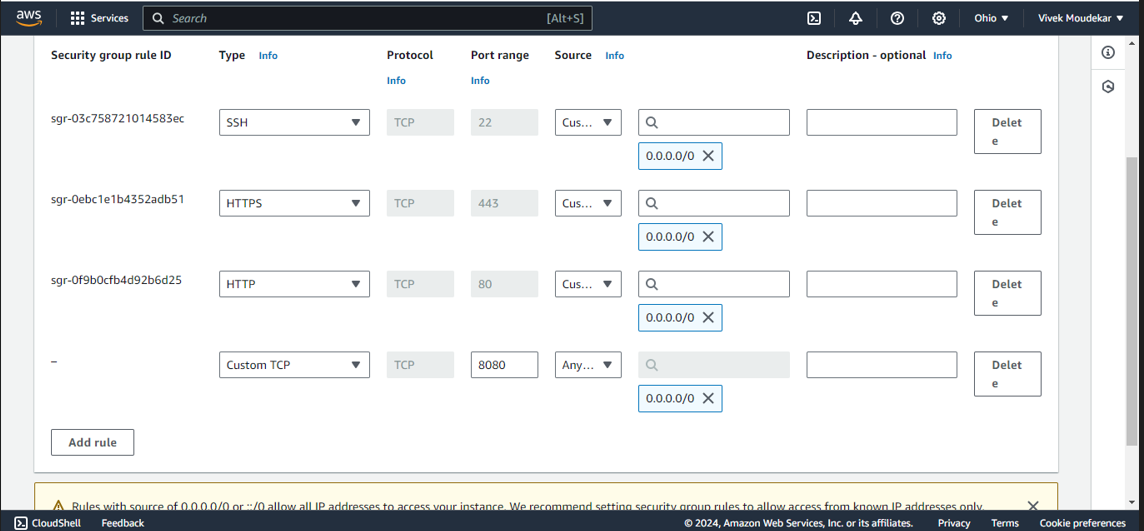
Jenkins by default run on port 8080 After successful Installation of jenkins to access the GUI we have to add the port 8080 to security group-> inbound rules.
Copy the Public URL of Instance go to browser and paste <Instance Public Url>:8080, and it will display UI first when we acess jenkins is locked.
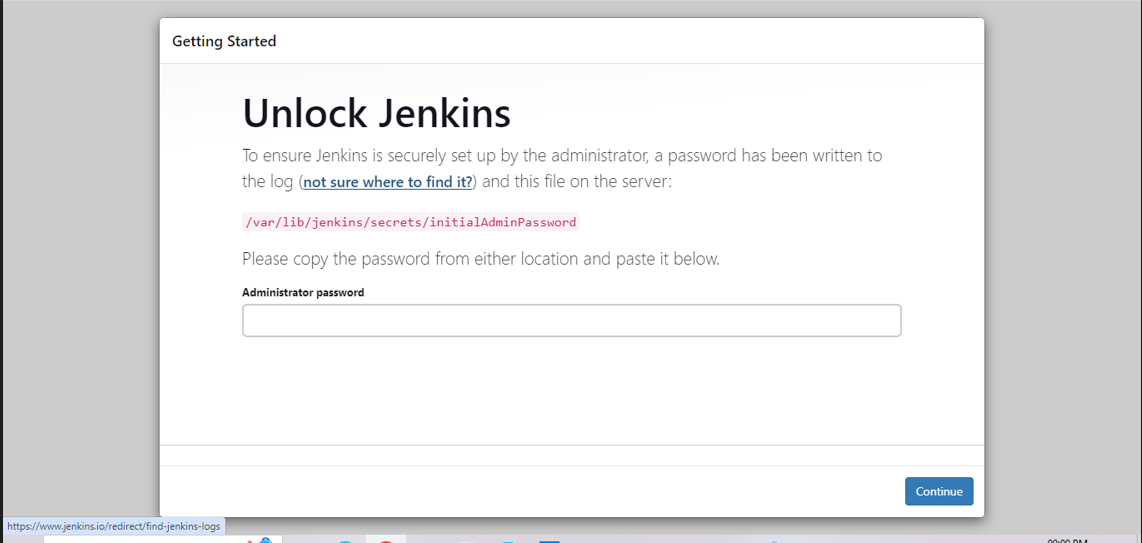
To Unlock Jenkins copy the given path /var/lib etc, and go to terminal and paste with.
sudo cat <path>
#This command will provide us with password copy and paste it in the admin password and continue
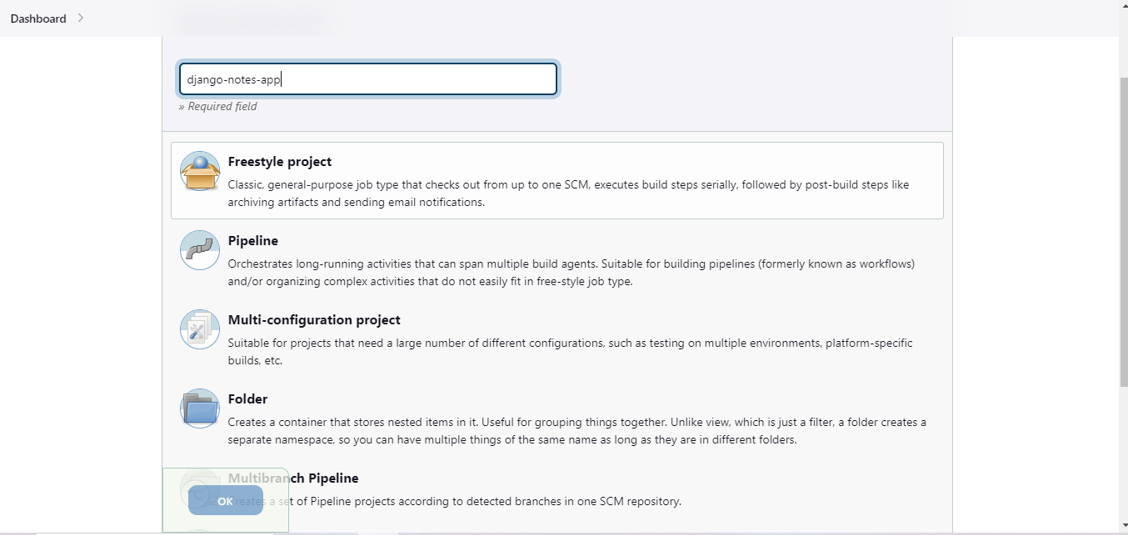
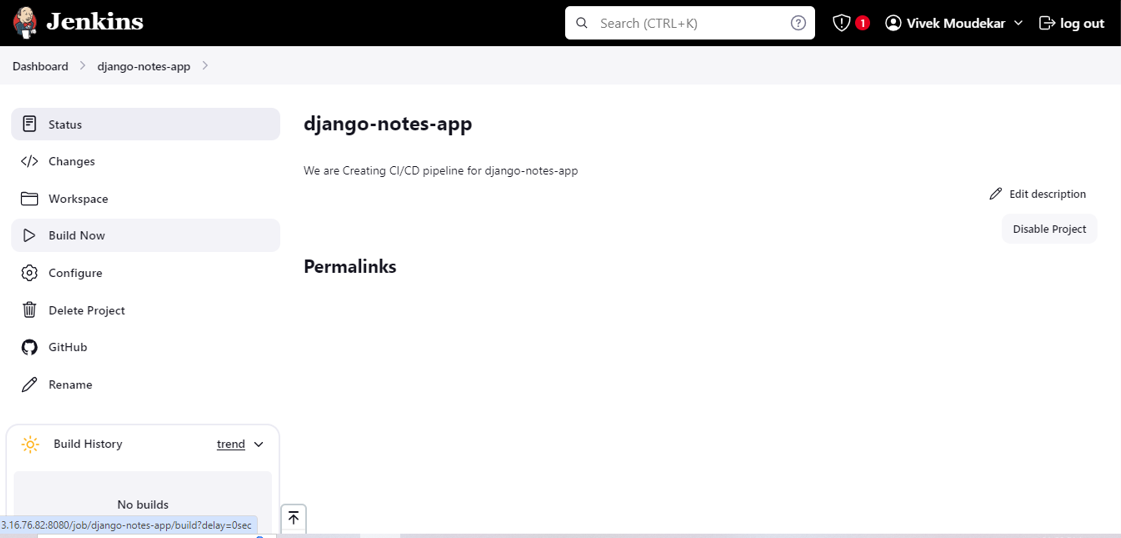
Step 1: Create a Freestyle Project
Now, let's set up a Jenkins freestyle project to automate the building and running of your Dockerized app.
From the Jenkins dashboard, click on "Create a Job" to create a new project.
Enter a project name and choose the "Freestyle project" option.
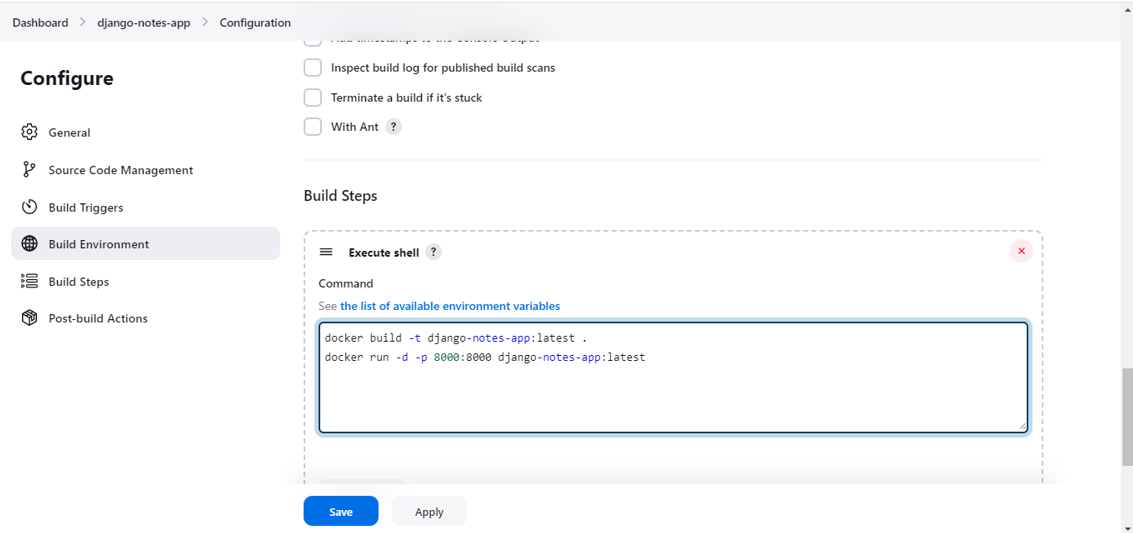
In the project configuration, go to the "Build" section.
In the "Build" section of the project, add a build step to run the "docker build" command to build the image for the container.
Add a second step to run the "docker run" command to start a container using the image created in step 3.
But before Building the image we have to install docker first in our machine for that we will use command.
sudo apt-get install docker.io docker-compose -y
#we are also installing docker compose as we will need that in next task
If we want jenkins and docker to be automatically restart after restarting system will use.
sudo systemctl enable jenkins
sudo systemctl enable docker

To run our docker commands we have to add our ubuntu user to the docker group.
sudo usermod -aG docker $USER
# This will add our current user to the docker group
But after doing this steps will get error because we have'nt added jenkins user to the docker group for that use command.
sudo usermod -aG docker jenkins

we can see using cat /etc/group we added ubuntu user jenkins to docker group.
Now, restart both docker and Jenkins

We are now ready to build without any error.
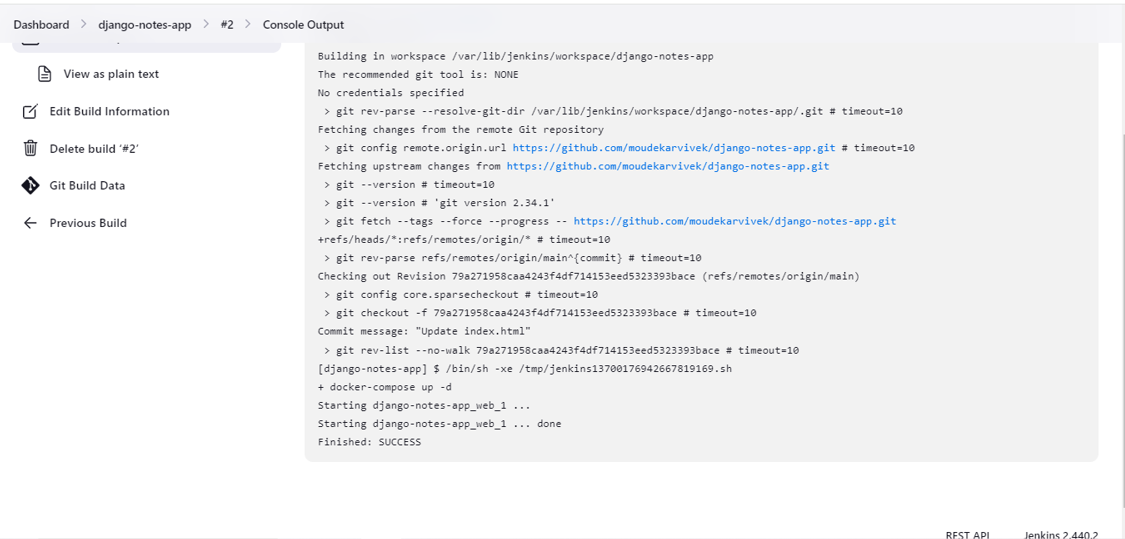
Build Now -> Console Output
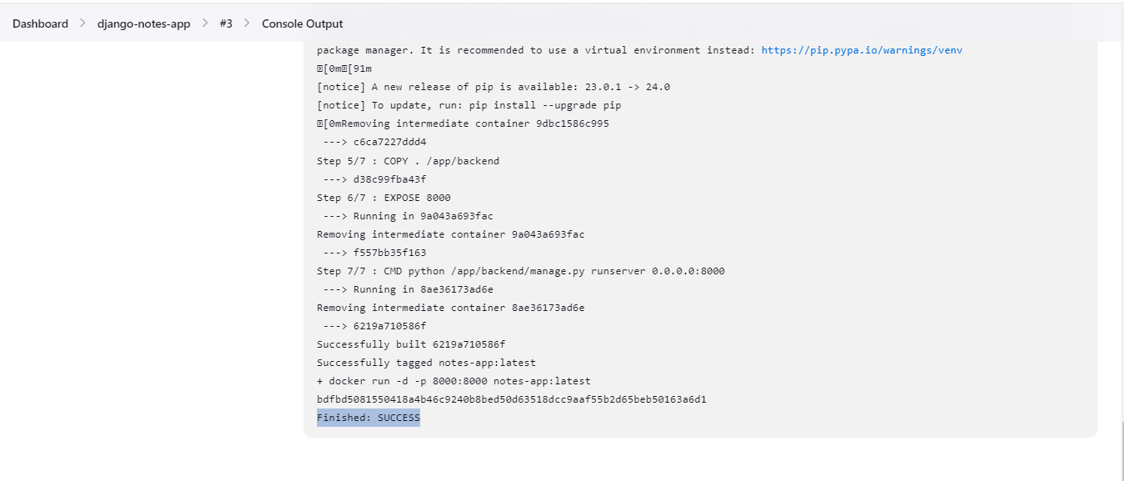
Successfully Build and run.
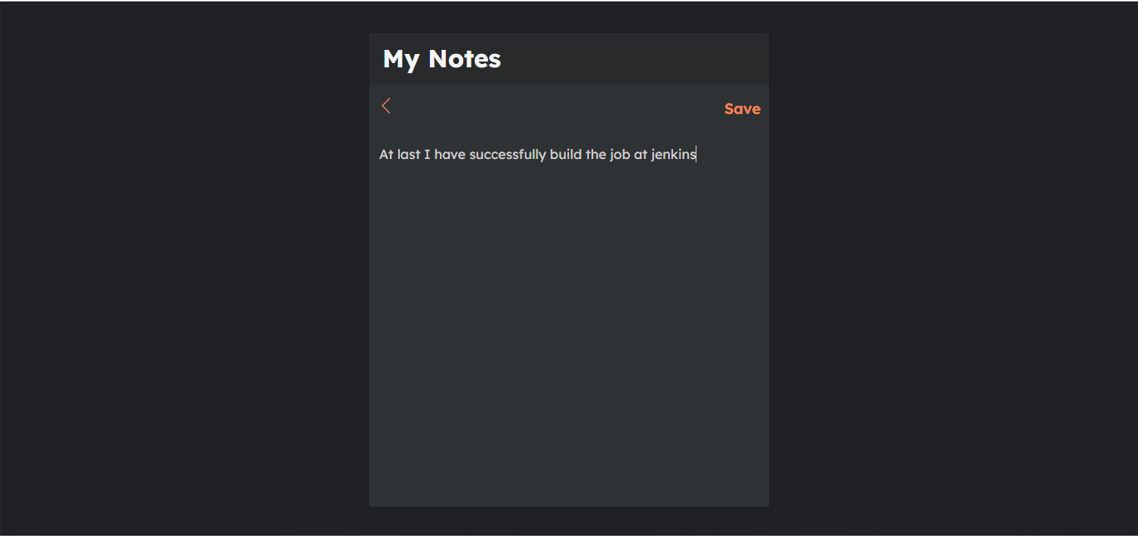
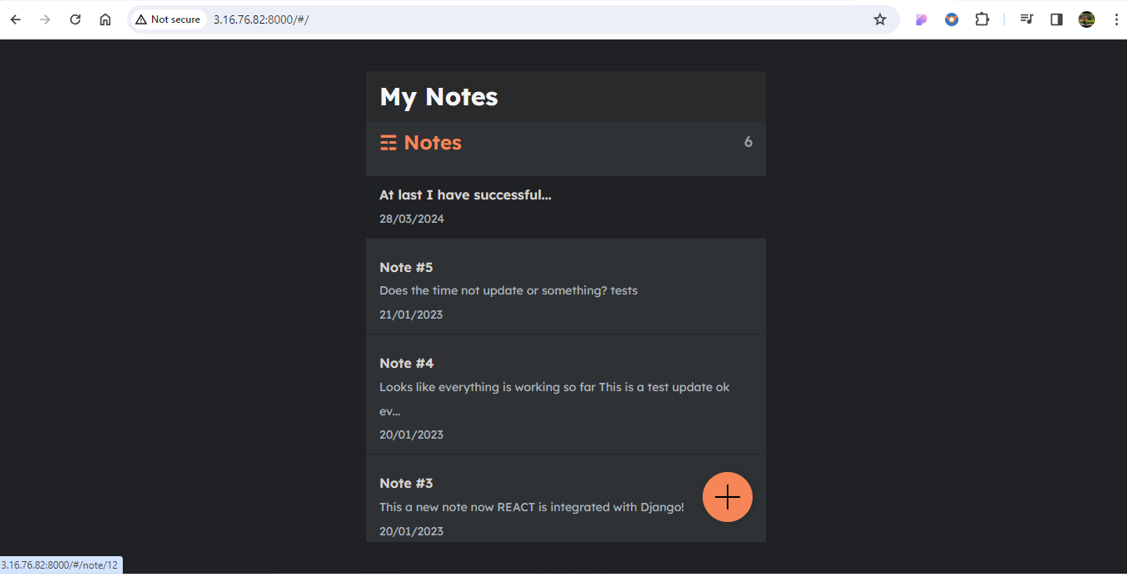
Add 8000 port in EC2 & copy the IP address & paste it into the URL with 8000 port
Task-02: Orchestrating Containers with Docker-Compose
Step 1: Create Jenkins Project for Docker-Compose
In Task-02, we'll create a Jenkins project to handle the orchestration of multiple containers defined in a Docker Compose file.
Follow the steps outlined in Task-01 to create a new freestyle project in Jenkins.
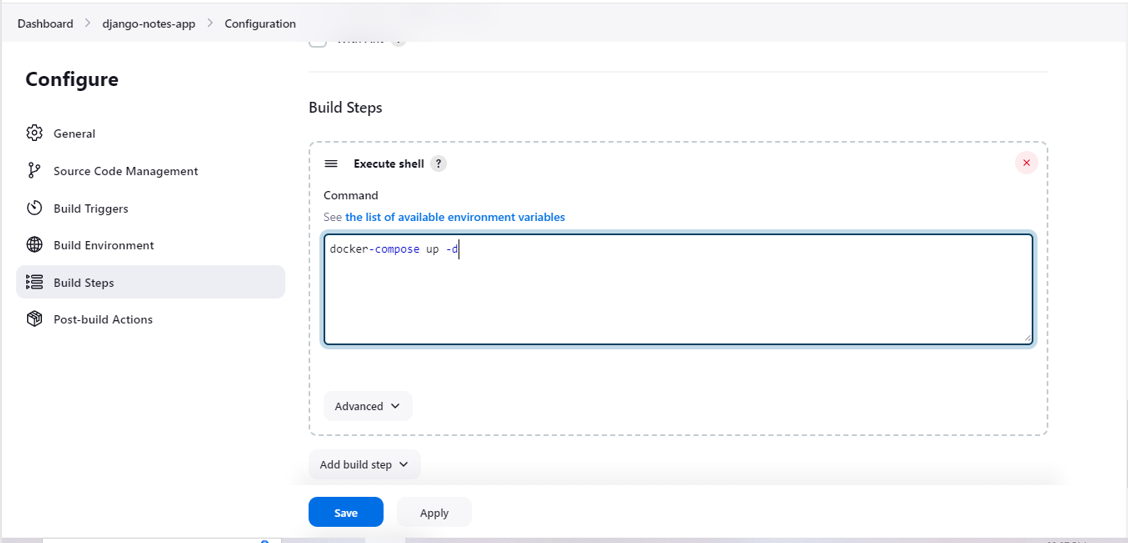
In the project configuration, navigate to the "Build" section.
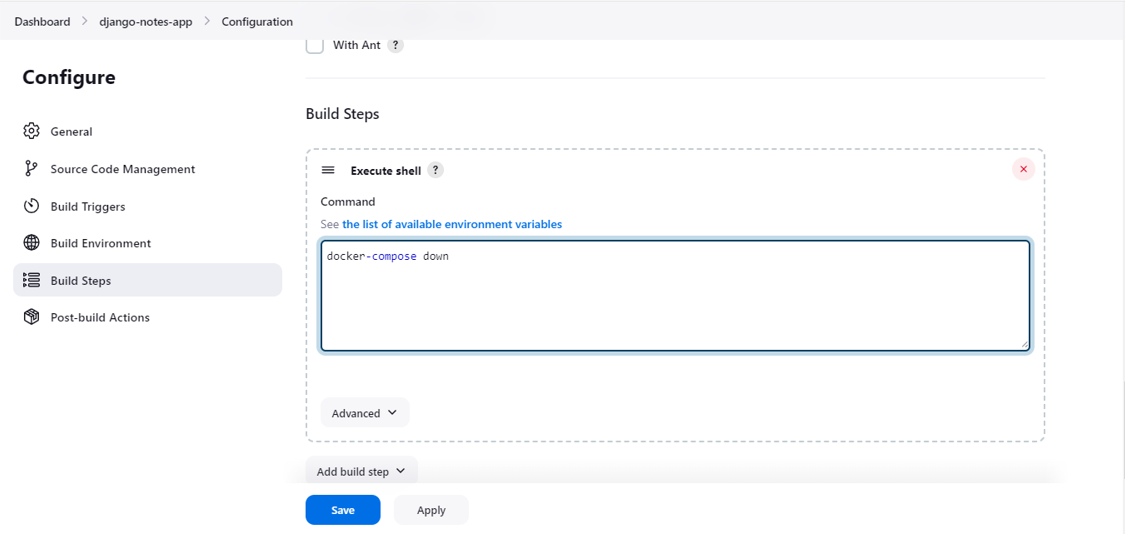
But before running this command kill your previous container as it has occupied the port 8000 this will not allow docker compose to work.
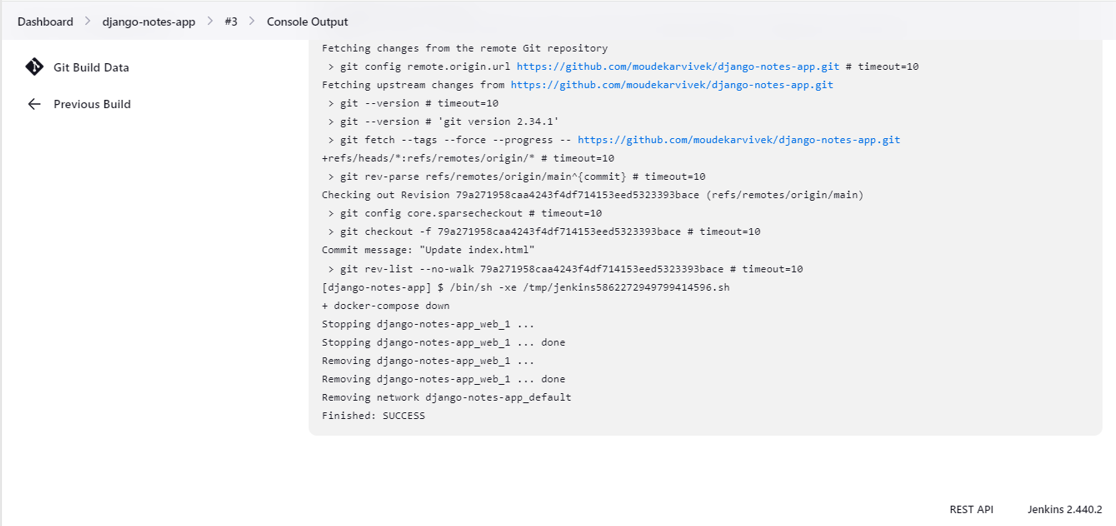
Set up a cleanup step in the Jenkins project to run the "docker-compose down" command to stop and remove the containers defined in the compose file.
😊 Happy learning!


