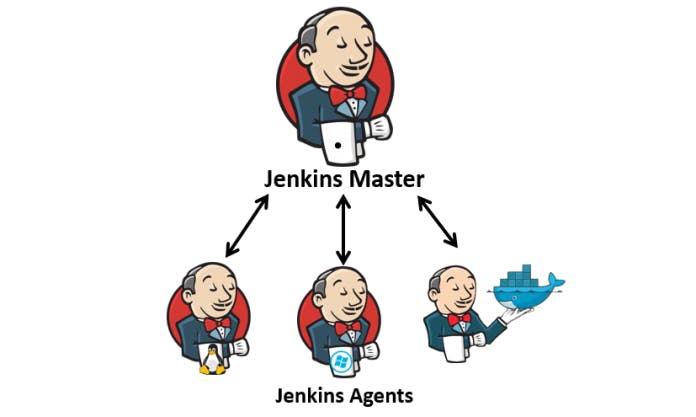
🖥Jenkins Master (Server)
Jenkins’s server or master node holds all key configurations. Jenkins master server is like a control server that orchestrates all the workflow defined in the pipelines. For example, scheduling a job, monitoring the jobs, etc, and distributes the build jobs to the jenkins agents(worker node) for executing.
🕴Jenkins Agent
An agent is typically a machine or container that connects to a Jenkins master and this agent that actually execute all the steps mentioned in a Job. When you create a Jenkins job, you have to assign an agent to it. Every agent has a label as a unique identifier.
When you trigger a Jenkins job from the master, the actual execution happens on the agent node that is configured in the job.
A single, monolithic Jenkins installation can work great for a small team with a relatively small number of projects. As your needs grow, however, it often becomes necessary to scale up. Jenkins provides a way to do this called “master to agent connection.” Instead of serving the Jenkins UI and running build jobs all on a single system, you can provide Jenkins with agents to handle the execution of jobs while the master serves the Jenkins UI and acts as a control node.

🔎Pre-requisites
Let’s say we’re starting with a fresh Ubuntu 22.04 Linux installation. To get an agent working make sure you install Java ( same version as Jenkins master server ) and Docker on it.
Note:- While creating an agent, be sure to separate rights, permissions, and ownership for jenkins users.
🔎Task-01
Create an agent by setting up a node on Jenkins
Steps:
1) Create EC2 instance as make sure to install Jenkins and Java as well.
2) Generate SSH keys on the "Jenkins-Master" ec2 instance
ssh-keygen
This will generate the public key in your master jenkins.
📍You need to add the public key from the "Jenkins-master" instance to the "Jenkins-agent" instance in the file named ".ssh/authorized_keys".
🖥Jenkins-master instance:
cd .ssh
ls #this will show authorized_keys, id_rsa, id_rsa.pub
cat id_rsa.pub #This will show public key copy this key
🕴Jenkins-agent instance:
cd .ssh
vim authorized_keys #add the public key of Master Jenkins to this
3) To create an agent on Jenkins:
📍 Click on "Manage Jenkins". Then, click on "Manage Nodes and Clouds".
📍To create a new node, click on "New Node" on the left side of the page. This allows you to set up your first agent.
📍Add details of your node, according to given boxes.
📍Choose "Launch agents via SSH" as the launch method. Enter the public IP of the agent in the "Host" field. Click on “Add” under Credentials.
📍Add the private key that we created in the 'Jenkins-master' instance using ssh-keygen.
📍Click on 'save' to create the node. You'll see the agent connecting and coming online. Your agent is now ready for use.
📍Our agent is launched.
🔎Task-02
1) Run your previous Jobs on the new agent
📍 To make this work, use labels for the agent so that your master server triggers build for the agent server.
📍 Create a freestyle project: In Jenkins, click on "New Item," enter a name, choose "Freestyle project," and click Ok.
📍 Fill in the description field.
📍 Select "GitHub project" checkbox and enter your repository URL from where you will clone all files of your project.
📍Navigate to your job's configuration. In the label expressions, add the label you assigned to your node.
📍Click on "Save," and your project will be associated with Agent-1.
📍 Now, initiate a build for your project and check the console output for details.
Happy Learning :)